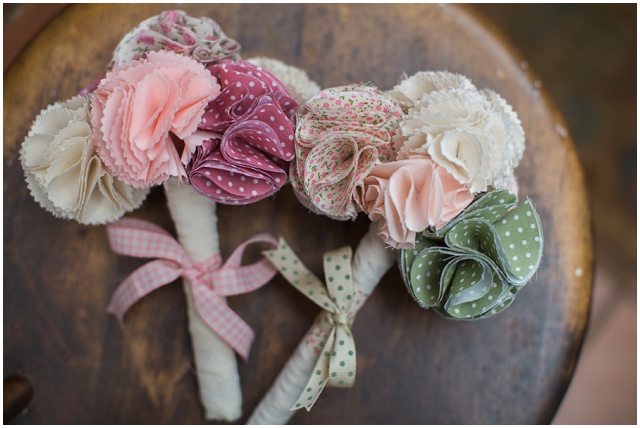
Hello my lovelies! How are you on this grizzly old day? I’m good thank you very much. Keeping busy and all that, and I’m sure you know that feeling… Do remember to take time out from all the wedding planning though: it can become an all consuming process, and if you’re not too careful you could face burn out. If you do have bags of energy however, and you fancy a DIY wedding project, I have a brilliant tutorial to share. A how to make you’re own fabric posy. They’re so sweet and perfect for your bridesmaids, flower girls or even for yourself!
DIY tutorial – How to make a Fabric Posy – By Alex
What you will need –
Fabrics
Needle & thread
Circular template
Scissors
Pinking scissors
Pipe cleaners
Elastic band x1
Wooden lolly pop sticks x2
Glue gun with glue sticks
Ribbon
Pencil
Stage 1
Select the fabrics you would like. You can make your posy in a number of different colours or stick to one or two, depending on your wedding colour theme.
Stage 2
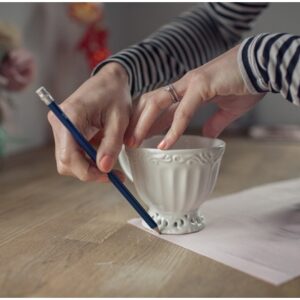
Depending on whether your fabric is plain or printed will depend on how many circles you will need to cut out. For plain fabrics you will need to cut out 14 circles per flower. 7 for each side of the flower. For printed fabrics you will need to cut out 20 circles as these will be double sided and each half of the flower has 10 circles. Printed fabrics need to be double sided as when folded you can see the printed design on both sides.
Stage 3
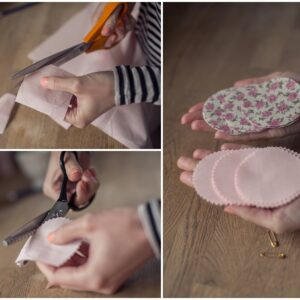
Once your circles are drawn onto your fabrics you can cut them out using fabric scissors or pinking scissors. Pinking scissors give your fabric a detailed jagged edging which creates a pretty flower shape once folded. It is nice to have a mix of pinking edges and normal edged flowers in your bouquet as they look like a range of different flowers when all tied together.
Stage 4
When your circles are cut out you need to construct each half of the flower separately.
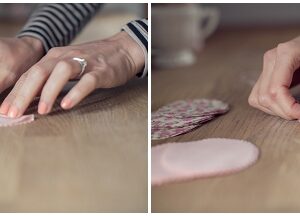
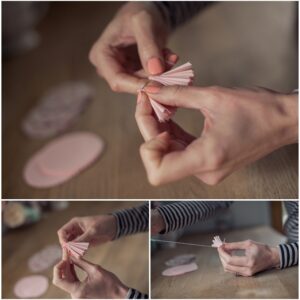
Starting with the plain fabric circles – Get your circle and fold in half, then in half again.
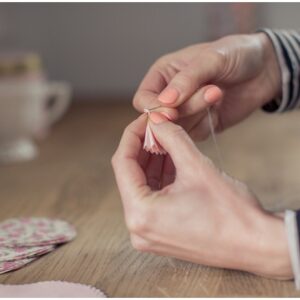
Holding the folded fabric with the open curved side to your left, a straight side along the top and the straight folded side to your right, you then take your threaded needle and make a stitch through the top right corner.
Repeat this process until all 7 circles are joined together and pull the thread all the way through until the knotted end is tight against the bottom circle. Your circles should look like this…
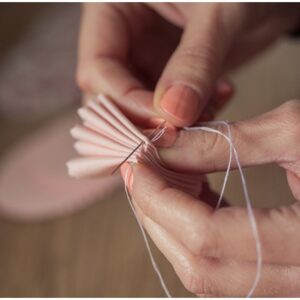
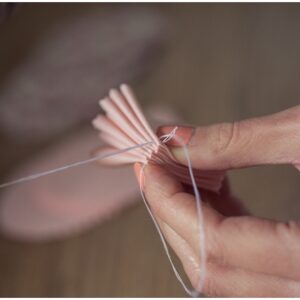
Then take your needle back through the 1st circle.
And pull tight.
Then put your needle back through the same stitch. As you start to pull the thread through you will notice a loop forming. Place your needle through the loop and pull tight. Repeat this step again. This basically creates a double knot to keep the flower secure and maintain its shape. Once your flower is stitched, place it on the table and play around with the petals to open it up. It will look like this…
Then repeat this process to create the other half of your flower.
To create a printed flower – Using two circles, place the wrong sides of the fabric together (so the pattern shows on the top and bottom of the circles)
You then fold in half…
… and half again and follow the same steps as above. Because you have double sided the fabric you do not need to create 7 folds of fabric like with the plain fabrics. You make x5 folds instead, as pictured…
Stage 5
To create the flower stem you need x3 pipe cleaners per stem.
You wind x2 pipe cleaners together creating a thicker stem.
Then with your 3rd pipe cleaner, you wind this around the previous 2. This makes the stem a lot sturdier. Repeat this process to create 7 stems. (or however many flowers you wish to make)
Stage 6
To attach the flower halves to the stem you use your hot glue gun and take x2 flower halves. Put glue over the top of one of the pipe cleaners.
You then carefully place the flat side of one of the flower halves onto the pipe cleaner and press firmly.
You then glue the reverse of the pipe cleaner and repeat this process, placing the flat side of the flower against the pipe cleaner and push together firmly.
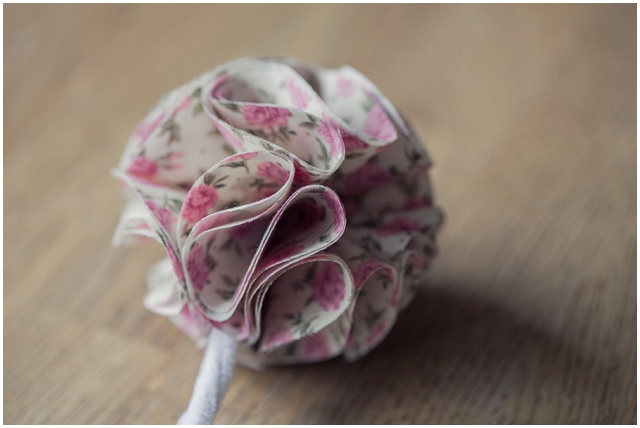
Repeat this process for all the flower halves and the finished flowers will look like this…
Stage 7
Gather your flowers together and arrange your posy how you would like it.
Once you have arranged your flowers get x2 lollypop sticks. On one lollypop stick, put a dab of glue at either end and place the other lollypop stick on top.
Insert the sticks through the middle of the pipe cleaners up into the flowers.
Then tie an elastic band tightly around the pipe cleaners and sticks.
The lolly pop sticks create strength and make the posie sturdy and secure and the elastic band holds everything in place so the flowers do not move when you are tying your posy together.
Stage 8
Using more of your pipe cleaners work from the very top of your posie, down to the end wrapped pipe cleaners tightly around the stems. Remember to wrap them over the elastic band, so you create an even finish. It should look like this…
Continue this process right to the bottom.
Stage 9
Cut the ends of your pipe cleaners to the length you want. I find cutting them where the lollypop stick ends is the perfect length.
Stage 10
Using strips of fabric (whatever fabric you like) you place a small amount of glue on one of the flower head stems in the top of the posy, as pictured…
Start wrapping your fabric strip as close to the flower heads as possible. You want to cover up the pipe cleaners as best as you can.
You then carefully wrap your strip of fabric around the posie as tightly and neatly as possible to create an even finish. When you get to the bottom of the stem make sure you leave enough fabric to neatly fold and finish it. As pictured…
Stage 11
Turn your posy upside down and place hot glue onto the bottom of the posy handle.
Then fold one side of the fabric onto the glue. Place more glue over the top and fold the other side down. Repeat this until all sides are glued down and the bottom looks neat and tidy.
This process is much like wrapping a present. It will seal off the ends and stop your posy handle from unwrapping.
Stage 12
To finish off your posie cut a length of ribbon and tie it around the handle into a bow.
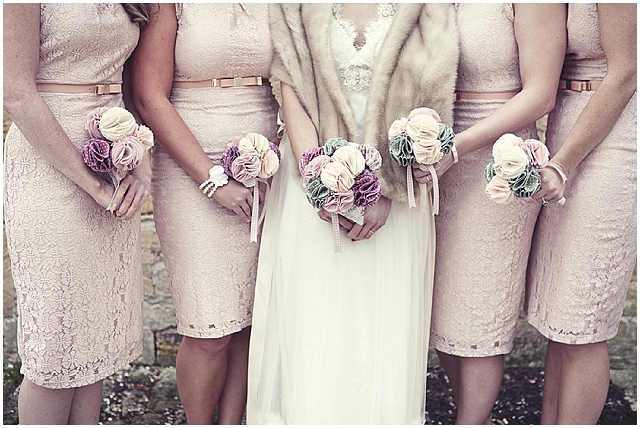
If this is all a bit too much hard work you can always buy one directly from me at my website. Select from a choice of colours and if you have a specific colour palette please do get in touch. The bridesmaid posies not only look beautiful, they are also the perfect gift and keepsake for your maids.
As well as the bridesmaid posy, I also make a bridal bouquet which is larger and is made from 12 flowers. Still as fresh in years to come as it was the day it was made, it is the perfect reminder of your special day.
To personalise your bouquet you can always purchase a bouquet token from me which can have your names and wedding date printed on and is then tied around your bouquet. The perfect personal finishing touch!!
Lovely big thank you to the brilliantly talented Binky Nixon for the photos of our DIY Bridesmaid posie tutorial. Find her here……
Photography by Binky Nixon Photography
Thank you so much for sharing this fab tutorial Alex! Ladies if you wanna see the bouquets in action, Alex made them for her own wedding too! A Country Cottage Styled Garden Wedding.
{image credit: Emma Lucy Photography}

 View the Gallery






Fantastic DIY tutorial.thanks for sharing
Oooh these look so cute, great tutorial.
Lovely bouquet and great fun to shoot!
gorgeous images hun and fab tutorial :) XxX
Fabulous – love it x
Me glad you likey :) XxX
Comments are closed.